Page 4 - Emeraude 2.60 Tutorial
Basic HTML Version
Emeraude v2.60 – Doc v2.60.01 - © KAPPA 1988-2010
Guided Interpretation #1
•
B01 - 2/38
The control panel contains 7 different ‘pages’ that may be activated by clicking on the
corresponding button:
Settings, Document, Survey, PL Interpretation, PNL
Interpretation, Special
and
Output
.
When the mouse cursor is moved on top of any toolbar or control panel button, a brief
description of the corresponding option appears in a popup window and in the status bar.
Settings
is the opened page when Emeraude is started. This mode can be used to define
permanent user settings in order to customize the following:
Application
: Autosave option, path to external user DLL’s (for user editions in the browser)
and a ‘Licenses’ tab to browse, define and update your license settings.
Interface
: Color of the control panel buttons and the background aspect.
Default Display
: Define all other display options: passes aspect, views aspects, view
templates, etc...
Mnemonics
: Edit/create a list of user defined mnemonics.
Interpretation
: Define subsets and defaults for PVT, slippage correlations and calibration
options.
Activate some specific modeling options.
Multi Probe Tools
: Specify the tool definition and color scale for imaging tool processing.
Default Units
: System of units at program startup and for new documents.
Default Print Setup
: Define the default print settings.
Create a new document using the
‘New’
icon in the toolbar (or the ‘New’ option in the ‘File’
menu).
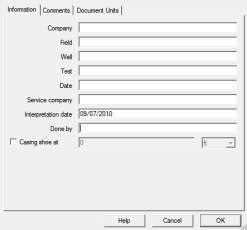
The ‘Job Information’ dialog is opened,
Fig. B01.2. This dialog has 3 tabs:
Information
: Basic information on
the job as it will appear in the report.
Comments
: They can be typed in or
pasted from the clipboard. They are
printed on the first report page.
Document Units
:
Display and edit
the system of units to be used in the
active document.
Fig. B01.2 • Job Information dialog
Enter the required information and validate with OK.

