User Tasks
User tasks is a much more powerful means of adding functionalities to K-A. Unlike functions, user tasks require software development knowledge but can use any available information from K-A and can create not only output channels but take a variety of actions like compiling custom plots, creating files, loading data to the files etc.
The principle of working with the User Tasks like with Functions is to first define a user task in the Automation mode and then create as many user tasks instances as necessary for any well or group of wells in PDG mode.
User Tasks fall under the two categories:
Built-in user tasks
Custom user tasks
Creating a User Task Instance
After a user task is created in the Automation mode, any number of User Task's instances can be created for any well or group of wells.
Creating a Single User Task Instance
Switch to PDG mode.
Select the field.
Select the well in the field hierarchy.
Click on User Task,
 , in the toolbar at the top.
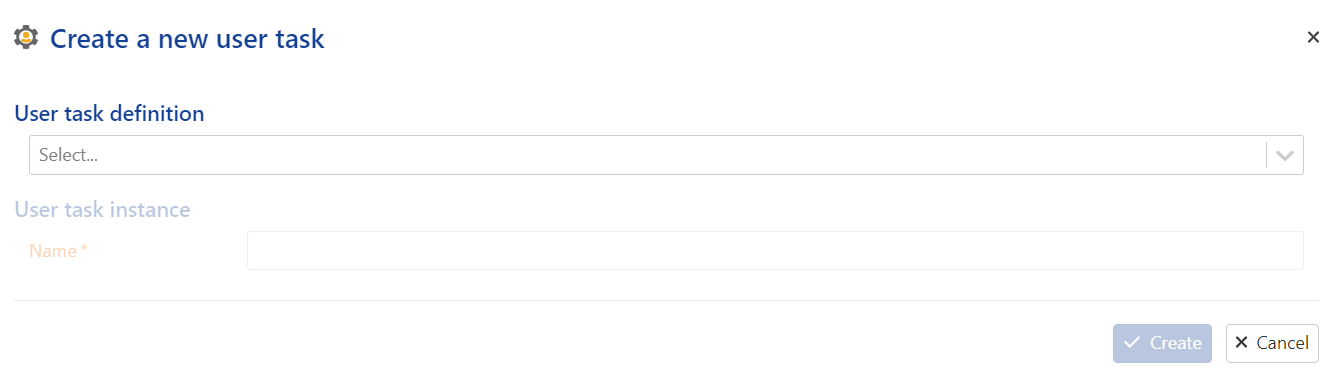
Select the user task from the User task definition drop down list. The list will display all the available user tasks.
Tip
Once selected, hover the cursor over the Info icon,
 , to read the user task description.
The dialog will be refreshed with the different input and output parameters and other settings related to the selected user task.
Rename the user task instance if needed.
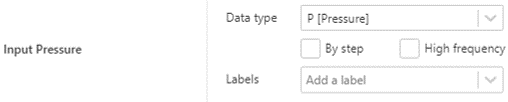
If necessary, edit the default input parameters. To redefine the data channels, use the drop down list or browse through the channels in the well.
Important
Inputs section contains a list of channels in the well having the data type that was defined when a user task was created in Automation mode. If no label was set the reference channel is selected by default. If a label(s) was added, the drop down list contains only the channels with the label(s) attached.. If there are no data of the necessary type in the well you will see No match found and the instance cannot be created (Create button is not active).
Note
If an input parameter is optional it can either be empty or have some default value. If it is not empty or you have set some value/selected some item from a list but finally decided not to use this optional parameter in the calculations, clear the input by clicking on
 .
.Tip
Data types and other input attributes can be edited from the user task instance dialog. For this click on
 to activate the dropdown list of attributes and edit it.
If the list of available channels is big it is possible to reduce the choice of the channels by introducing label(s) aprior.
Optional. In the Output section, add/remove or edit any labels which may have been assigned to the output channels.
Optional. For user tasks with output channels, the output can be previewed using .
Optional. For job settings:
Modify the timeout if needed.
Adjust the trigger mode:
Automatic (default)
Semi-auto (runs when created, then waits for user update)
Manual (requires manual start)

Click on Create.
Note
User task instances are listed under a dedicated User tasks folder under the well in the field hierarchy.
Switch to PDG mode.
Select the field.
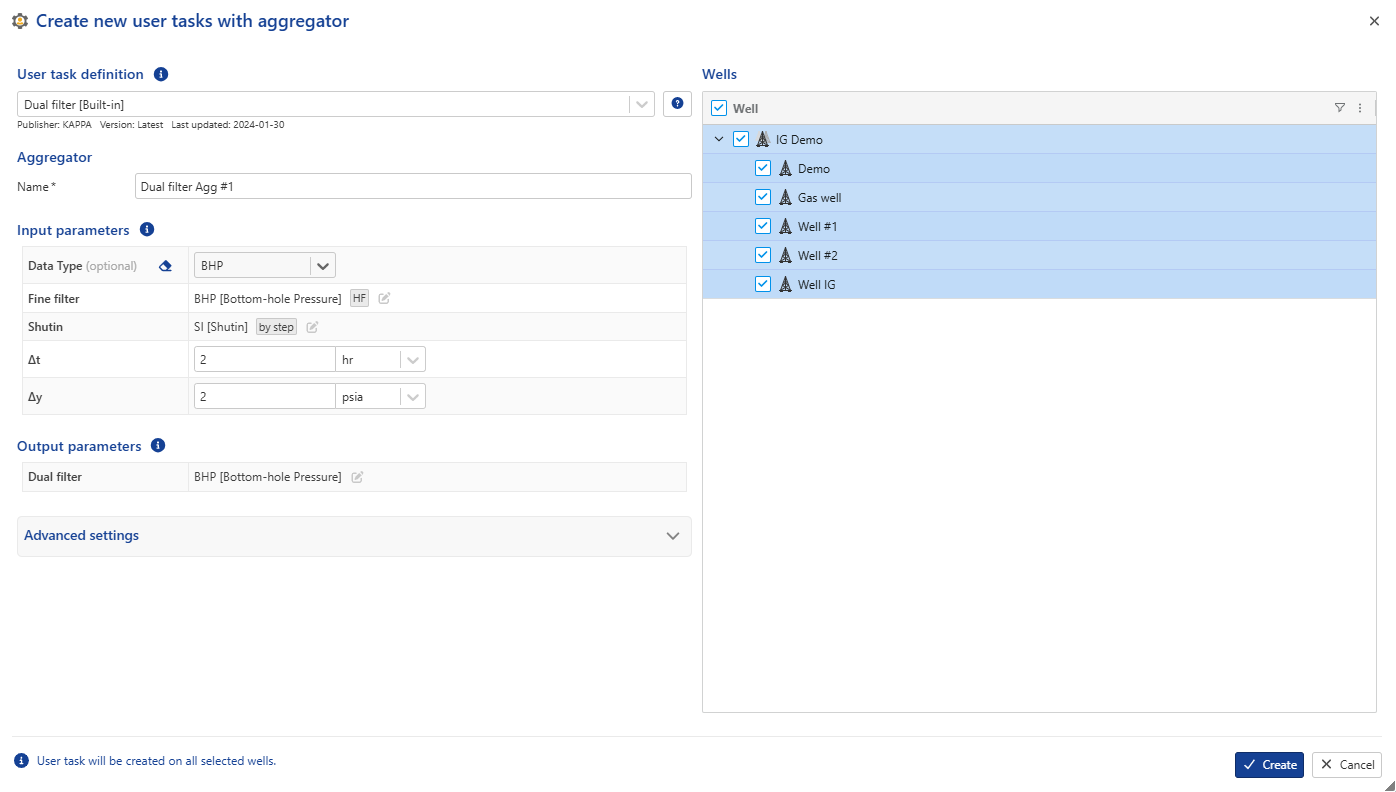
In the field/well group node click on Create User task with aggregator,
 , under the Info tab:
Select the wells for which the user task instance is to be created.
The remaining procedure is similar to the one explained above, with the following exception:
Important
In batch creation it is not possible to set the input data channels for each well individually; the reference channels of the corresponding data type will be used automatically or it is possible to define labels under for each channel.
Click on Create.
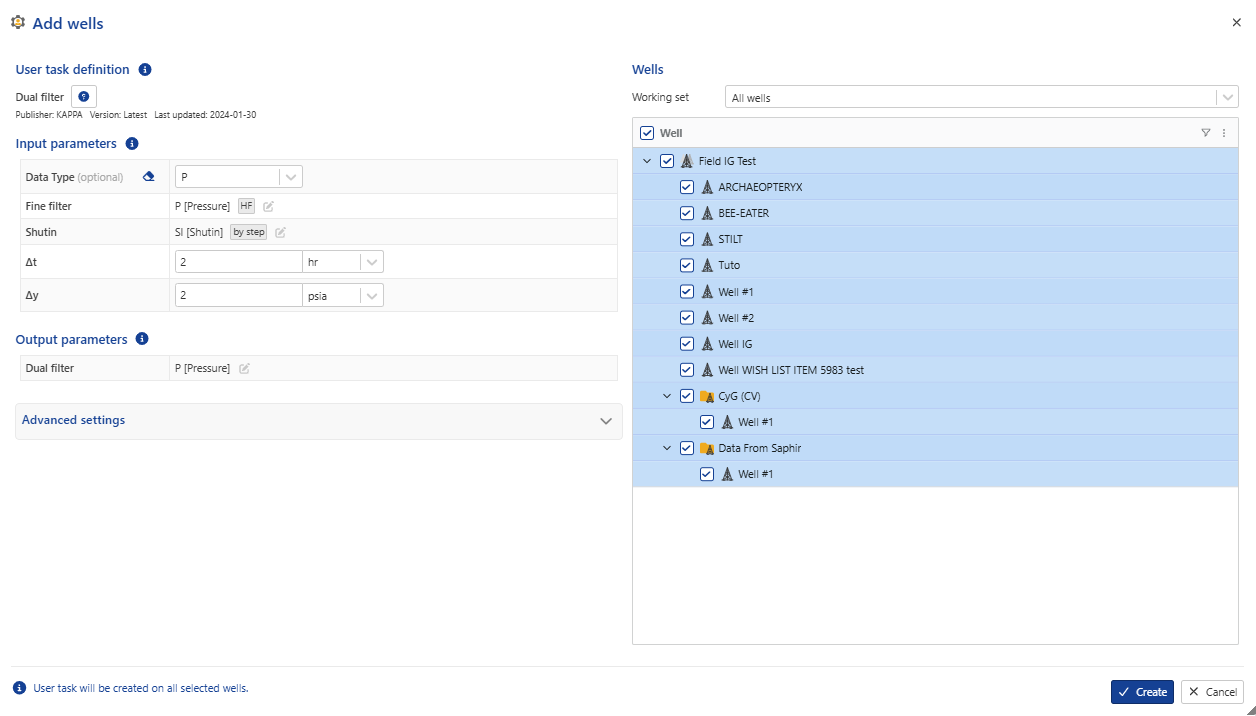
Add a new well to an aggregator
A new well can be added to an existing aggregator, with the limitation that only wells may be added; other existing inputs in the aggregator cannot be modified. To proceed:
Under the relevant field or well group, click the aggregator to be updated.
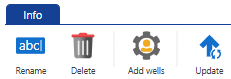
In info page, click on Add wells option ,
 .
.Select the well(s) to include.
Click on create
Managing User Tasks
Built-in user tasks cannot be deleted or edited. Their definitions may only be viewed. They may however be duplicated, and the duplicate edited.
Deleting a Custom User Task
Switch to Automation Mode.
Select User tasks in the hierarchy on the left.
Select any user defined user task in the list.
Click Delete at the top.
Duplicating a User Task
Switch to Automation Mode.
Select User tasks in the hierarchy on the left.
Select any user task in the list.
Click Duplicate at the top.
Editing a Custom User Task Definition
Switch to Automation Mode.
Select User tasks in the hierarchy on the left.
Select any user defined user task in the list.
Click Edit at the top.
Viewing a Built-in User Task Definition
Switch to Automation Mode.
Select User tasks in the hierarchy on the left.
Select any built-in user task in the list.
Click View at the top.
Managing User Task Instances
Renaming a User Task Instance
Select the user task instance in the field hierarchy.
Click on Rename,
 , in the toolbar at the top. Alternatively, right click on the user task instance in the field hierarchy and select Rename.
Enter the new name and click on OK.
Redefining a User Task Instance
Select the user task instance in the field hierarchy.
Click on Redefine,
 , in the toolbar at the top.
Edit the user task setup as needed.
Set the time from which to apply the new definition.
Click on Redefine.
Note
Dataset inputs for user tasks are now editable. It is possible to change the inputs when redefining a user task instance
Updating a User Task Instance
If the user task script is updated, user task instances may be updated to the new definition (they are not by default). To do so:
Select the user task instance in the field hierarchy.
Click on Update,
 , in the toolbar at the top.
If a new version of the script is available, the user is prompted to confirm update:

Click on Update.
Important
User task instances can also be updated directly from the aggregator level.
Updating Multiple User Task Instances in Bulk
Switch to Automation Mode and select the User tasks node.
Select the user task definition.
Click on Update,
, in the toolbar at the top:The dialog will list all the fields and wells where the selected user task is used, along with the Current version date and Update status:
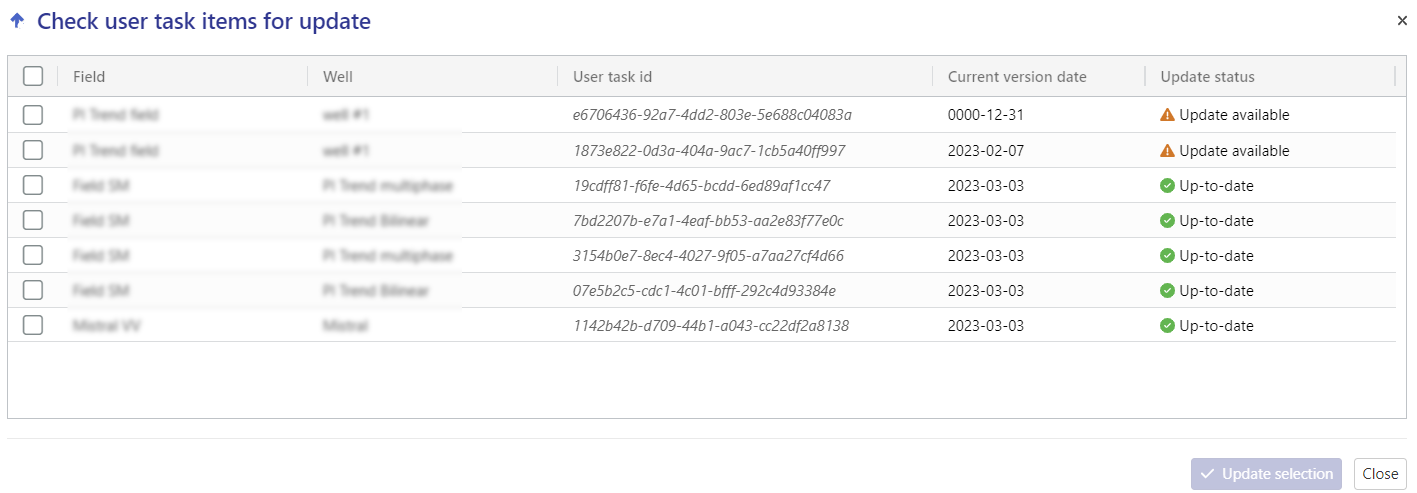
Select the wells for which the user task instance needs to be updated.
Click on Update selection.
Deleting a User Task Instance
Select the user task instance in the field hierarchy.
Click on Delete,
 , in the toolbar at the top. Alternatively, right click on the user task instance in the field hierarchy and select Delete.
In the Confirmation dialog, click on Delete.
Or,
Select the User tasks folder in the field hierarchy.
Go to the Children tab.
Select the user tasks to delete.
Click on Delete,
,.
Editing a user task instance outputs
It is possible to modify user task output datasets by removing specific data points or steps, especially when outliers need to be excluded.
Select the user task instance in the field hierarchy.
Go to the Info tab.
Click on Edit data ,
 , in the toolbar at the top.
Click on Area selection ,
 , and select the range
Click on Delete steps ,
 .
.
User Tasks Development
Some improvements have been introduced to existing user tasks. The details are outlined in the following sections.
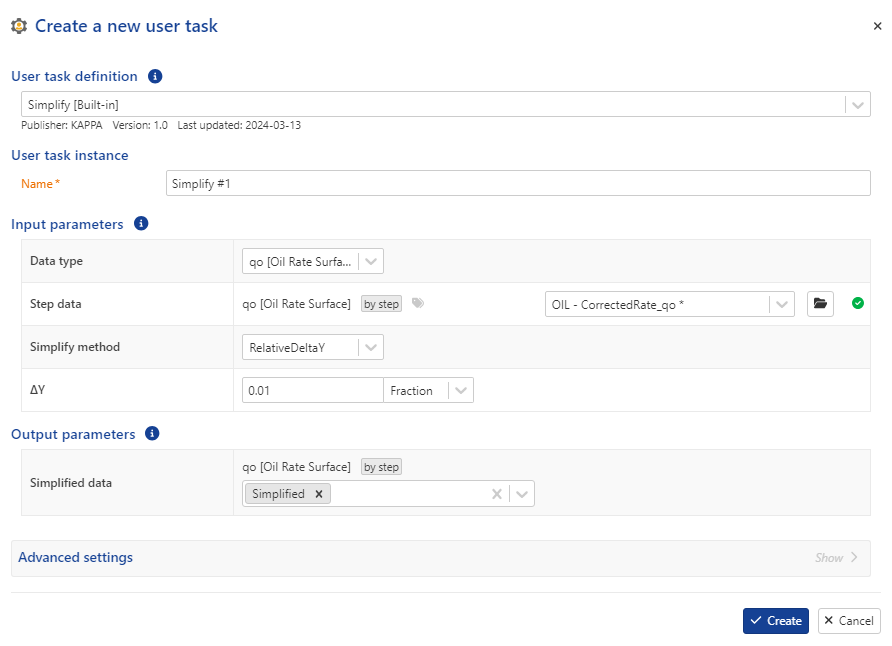
Simplify: built in user task
This user task, extracted from the the corrected production user task, is designed solely to streamline the rate. Its inputs encompass the rate data and its various types, simplification methods, and Delta Y. It gives a simplified rate as output.
 |
Switch to PDG mode.
Select the field.
In the field/well group node click on Create User task with aggregator,
, under the Info tab:Select the wells for which the user task instance is to be created.
The remaining procedure is similar to the one explained above, with the following exception:
Important
In batch creation it is not possible to set the input data channels for each well individually; the reference channels of the corresponding data type will be used automatically or it is possible to define labels under for each channel.
Click on Create.
Add a new well to an aggregator
A new well can be added to an existing aggregator, with the limitation that only wells may be added; other existing inputs in the aggregator cannot be modified. To proceed:
Under the relevant field or well group, click the aggregator to be updated.
In info page, click on Add wells option ,
.Select the well(s) to include.
Click on create