Exporting data
The user can export data to a pre‑defined database or as a CSV file by selecting any data set (gauge, filter, production rates, corrected production, well properties) in the field hierarchy.
Select a data set that can be exported, e.g. a gauge, in the field hierarchy.
Click on Export data,
 , under the Plot tab. The Export data dialog is displayed.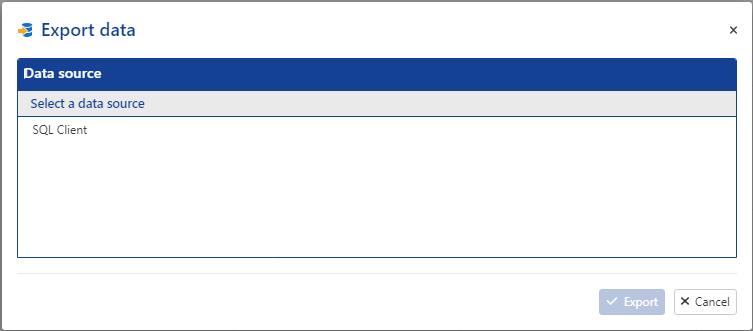
Note
The Export data option will only be available if data has already been loaded for the Well.
Click on the desired database to access the tag selection dialog.
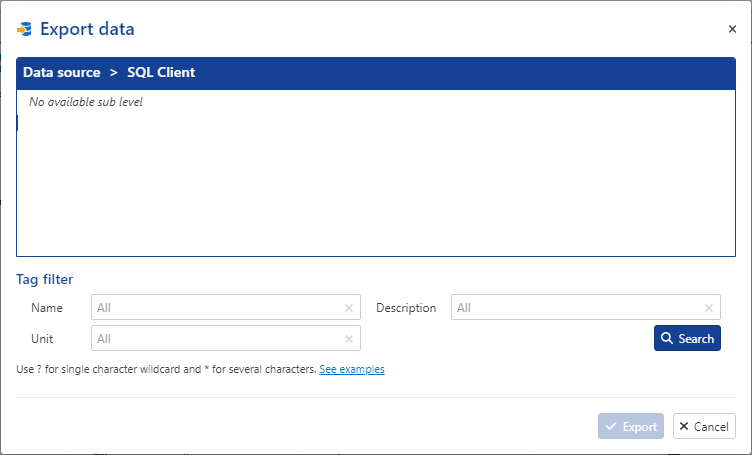
Click on the Search button to fetch the list of tags available under the current node of the hierarchy.
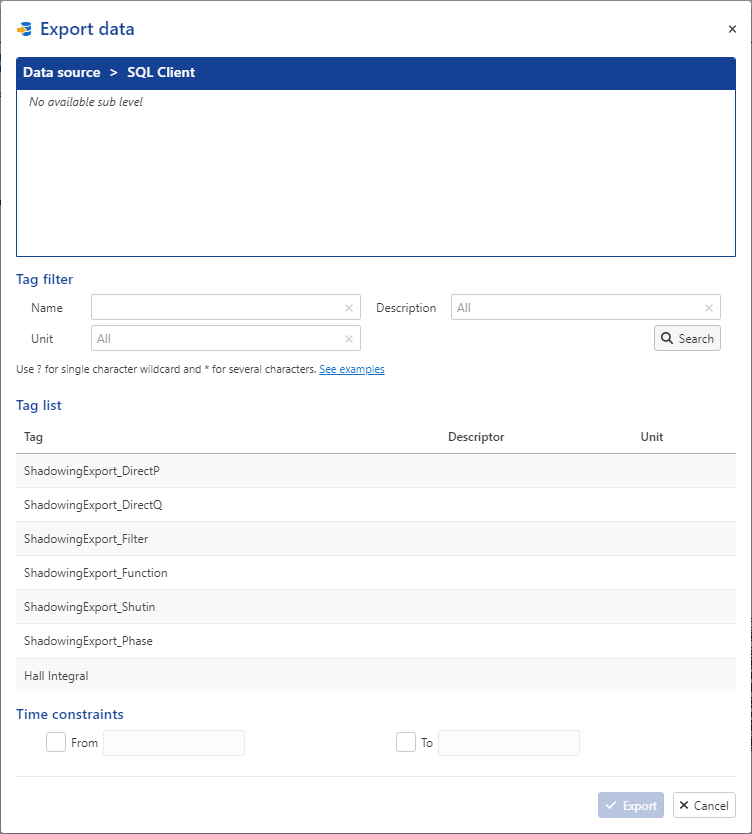
Tip
When looking for a tag, the user can apply filters by Name, Description, if any, or Units.
It is possible to filter results using a Tag mask, such as *, used to represent multiple characters, e.g. input Hall* in the Name field for any tags starting with 'Hall'.
When a tag is selected, the user has also the ability to set a time limit to export a portion of data available, using the Time constraints options.
Select a Tag from the provided list and proceed with the Export button.
Optional. Switch to Monitoring mode
 to check whether the export job succeeded.Open the job dropdown menu and select Export.
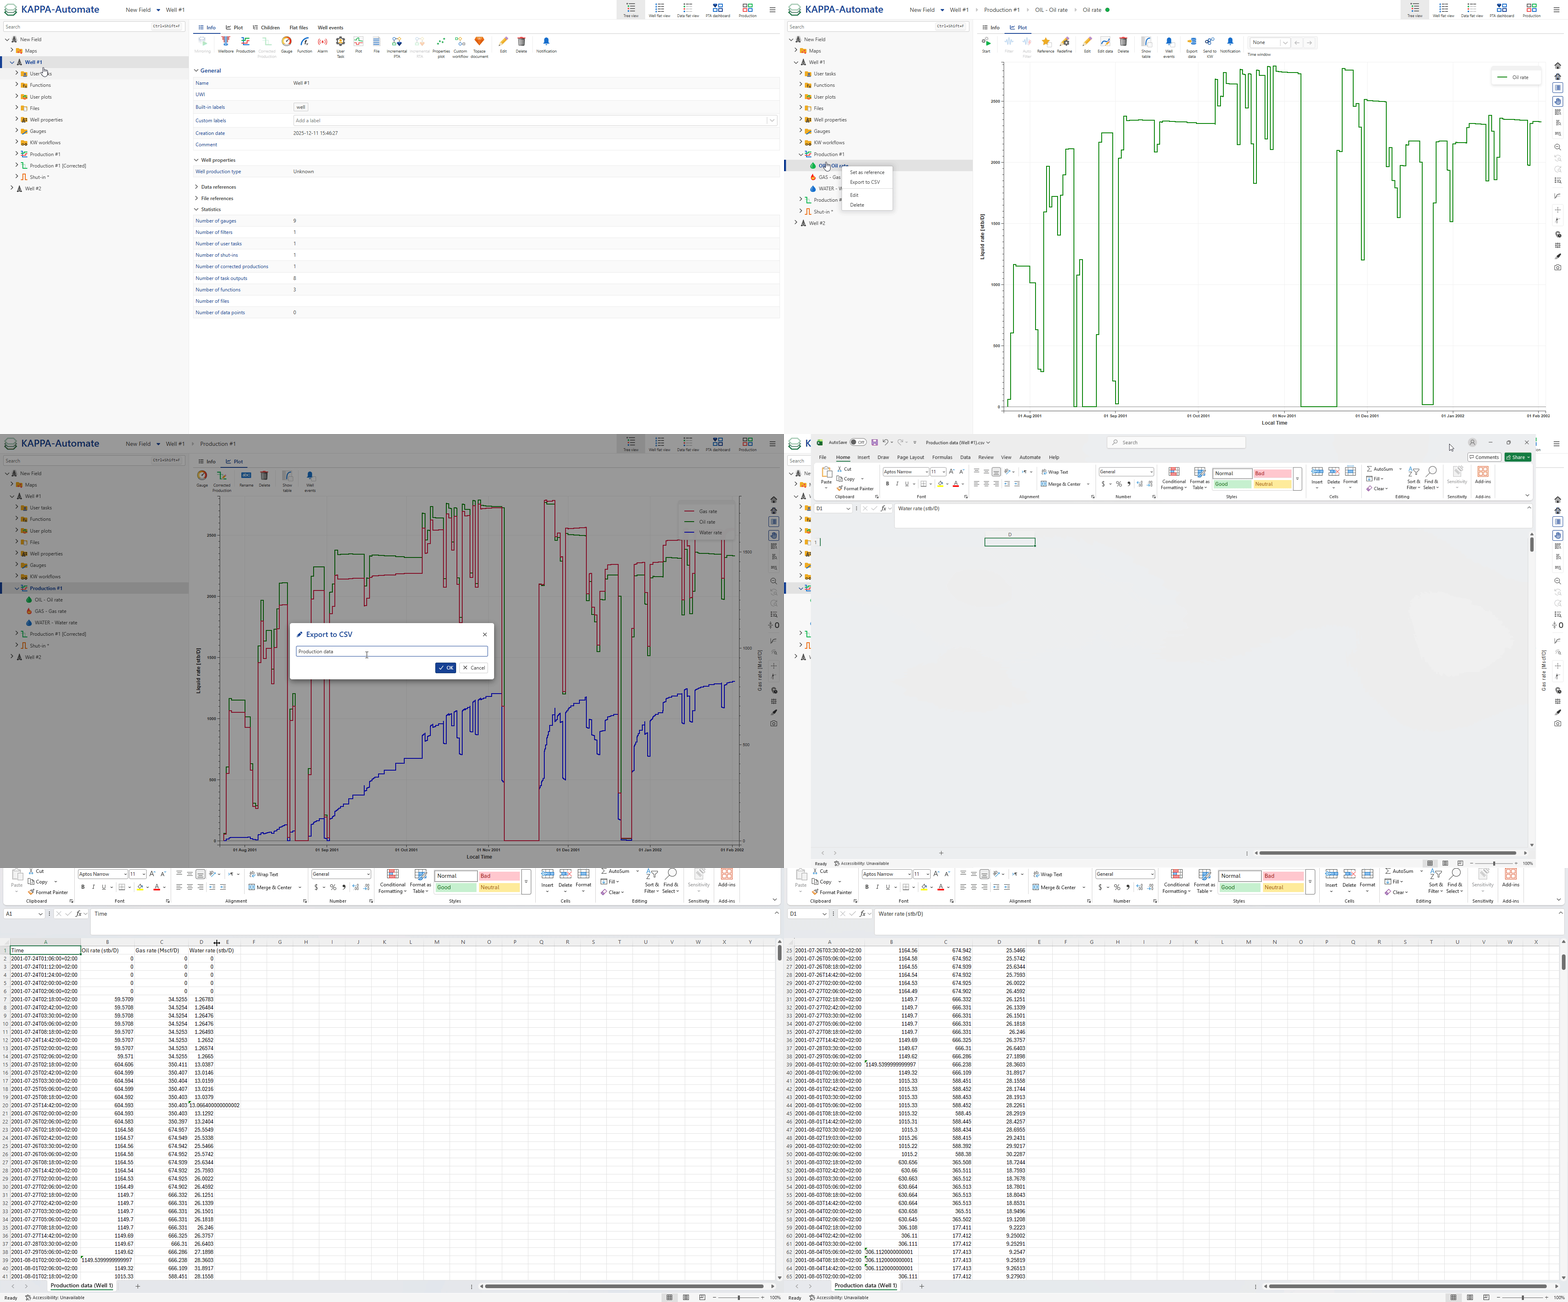
Select a data set or a folder containing exportable data (e.g., a production folder to export all phase datasets together, or individual phase rates inside the folder).
Right click on it, then select Export to CSV file.
Give it a name.
Click on OK.
A CSV file is created and downloaded to the local machine.
Open it to view the result.
All steps are shown in the .gif below.
 |