File Management
In a field, you can add, delete, replace, and produce other actions with documents, including K-W documents.
Uploading a Document Under a Well, Field or Files Folder
Select the well, field or Files folder in the field hierarchy.
Note
The Files folder will only be available if at least one file has already been loaded for the Well or Field.
Click on File,
 , under the Info tab.
Select the document to import.
Note
Documents cannot be uploaded in bulk.
All files are stored under a Files folder under the Well or the Field. If the folder does not exist i.e., no previous file has been uploaded at this level, one will be created once the file is successfully imported.
Downloading a Document
Select the document in the field hierarchy.
Click on Download,
 , under the Info or Plot tab.
Note
Documents cannot be downloaded in bulk.
Renaming a Document
Select the document in the field hierarchy.
Click on Rename,
 , under the Info or Plot tab.
Or,
Right click on the document in the field hierarchy.
Select Rename.
Replacing a Document
Select the document in the field hierarchy.
Click on Replace,
 , under the Info or Plot tab.
Select the file to replace with and click on Open.
Note
The file extension of the document being uploaded should be the same as the one it is replacing.
Warning
When replacing a document under iPTA as part of iPTA restart, the document names should also be the same.
Deleting a Document
Select the document in the field hierarchy.
Click on Delete,
 , under the Info or Plot tab.
Deleting Multiple Documents
Select the folder in the field hierarchy.
Switch to the Children tab.
Select what files or subfolders to delete.
Click on Delete,
.
Cleaning Documents
Select the document in the field hierarchy.
Click on Clean ,
 , under the Info or Plot tab.
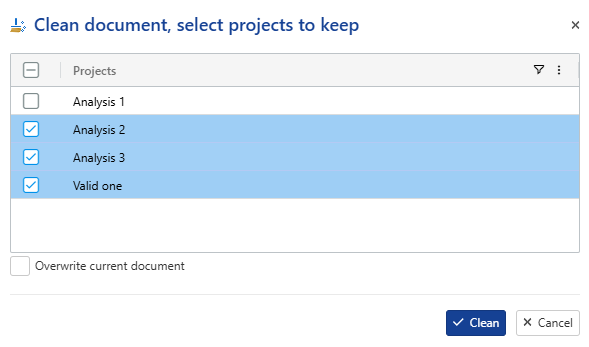
In the pop up dialog select the analyses to retain by selecting the desired entries.
Important
This functionality also removes any extra pressure and rate gauges. However, please note that if the rate being used is not referenced to production events, the cleaning process may not be fully effective.
Click on Clean.
The file will then contain only the selected analysis to be kept.
Flat File tab
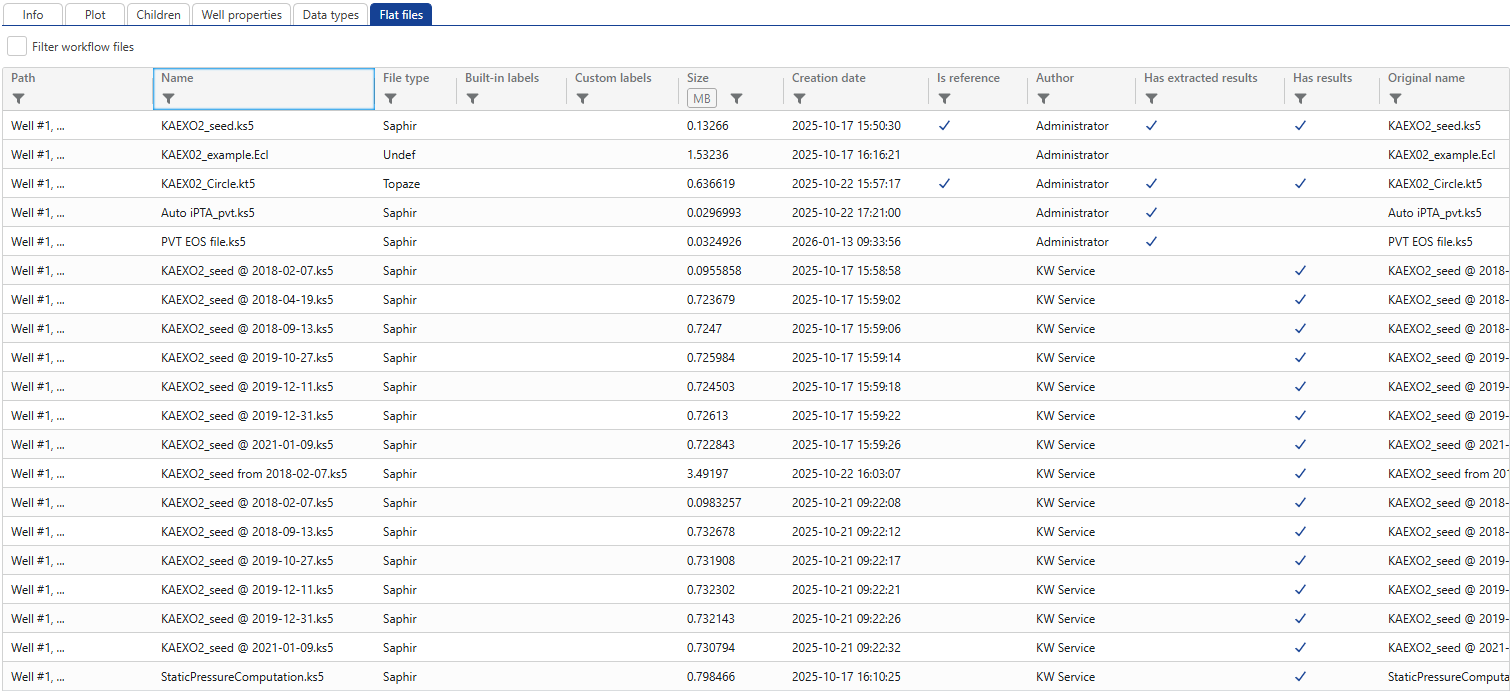
Within any selected node (Field, Well Group, or Well), you can switch to the Flat Files tab. This view displays all files associated with that node, along with key details such as file path, name, type, labels, and more.
If you enable the Filter Workflow Files option, all files generated from KW Workflows will be hidden from the list.
 |
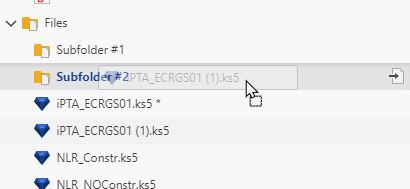
Moving Files between Folders
To move files from one folder to the other, simply drag and drop the file from the source to the target folder in the field hierarchy:
 |