KAPPA-Workstation Document Management
Documents of any kind can be uploaded in a field, including K-W documents. When Saphir or Topaze documents are uploaded under a well or field, they are automatically pre-processed by KAPPA-Automate. The following are read as part of document pre-processing:
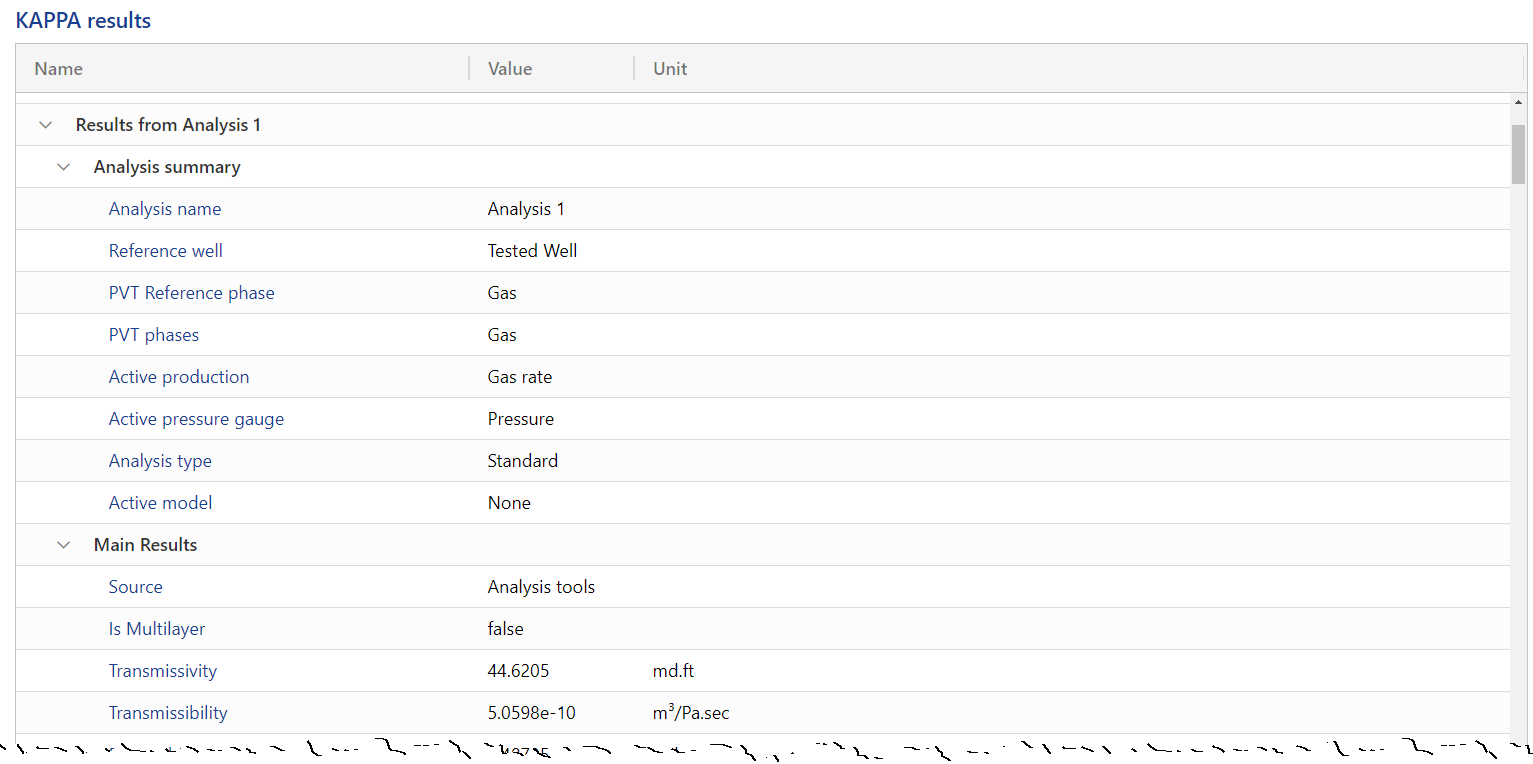
Analyses results: To view analyses results, click on the file in the document hierarchy, go to the Info tab and scroll down to the table under the KAPPA results section:
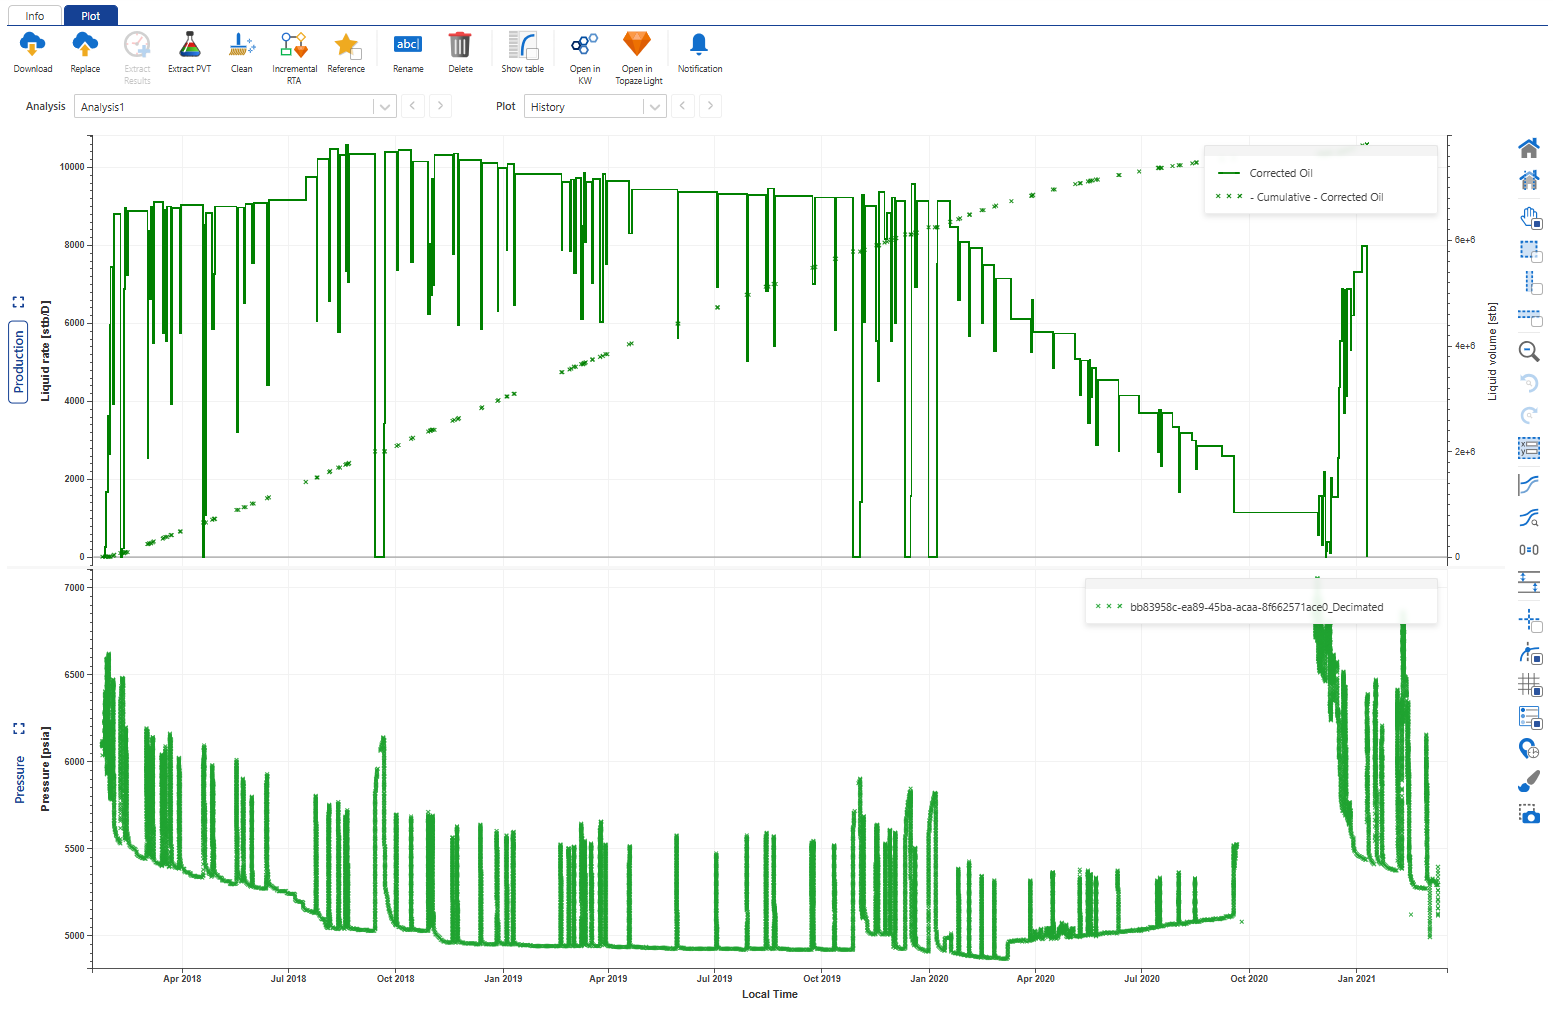
Analysis plots: To view analyses plots, click on the file in the document hierarchy and go to the Plot tab (see Item Plots for more details). Users can toggle through the different analyses in the file as well as the plots in each. The following plots are available to view:
Saphir: Loglog plot, History plot and Semilog plot (including lines and markers, if present)
Topaze: Loglog plot and History plot
Preprocessing Status
The preprocessing status can be checked under the Info tab, under the Automation -> DocumentPreProcessing section:
 |
Workflow clip
Analysis results can be extracted manually from the documents stored under a well and saved under either the Master well properties container or a separate properties container, the main use case being to track the evolution of parameters with time. Well properties results can be plotted or used in further processes or computations.
Extraction of results can be configured as desired from the XML file contained in the K-W archives (see Well Properties and Customizing Well Properties Catalog for more details).
Select the KW document under a well in the field hierarchy.
Under the Info or Plot tab, click on Extract Results,
 .
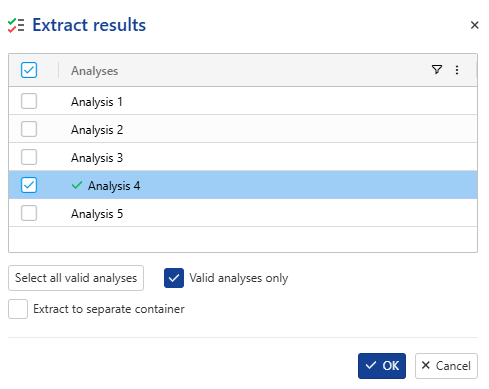
.Select the analysis(es) from which to extract the results.
Note
To extract results only from analyses flagged as valid, tick the Valid analyses only option.
Check Extract to separate container to extract in a folder different from the Master one.
Note
The name of the new container will be inherited from the name of the file used for the results extraction.
Note
If Master container has properties and option Extract to separate container is not selected, the properties in the container will be updated with the new values, the old values will be kept.
Select the folder under in the field hierarchy.
Under the Info tab, click on Extract Results,
 .
.Select the strategy to adopt for results extraction from each file:

Extraction Status
The extraction status can be checked under the Info tab, under the Automation -> ResultExtraction section:
 |
Note
The ResultExtraction section only appears once results have been extracted. This section will not appear for documents where results have not been extracted.
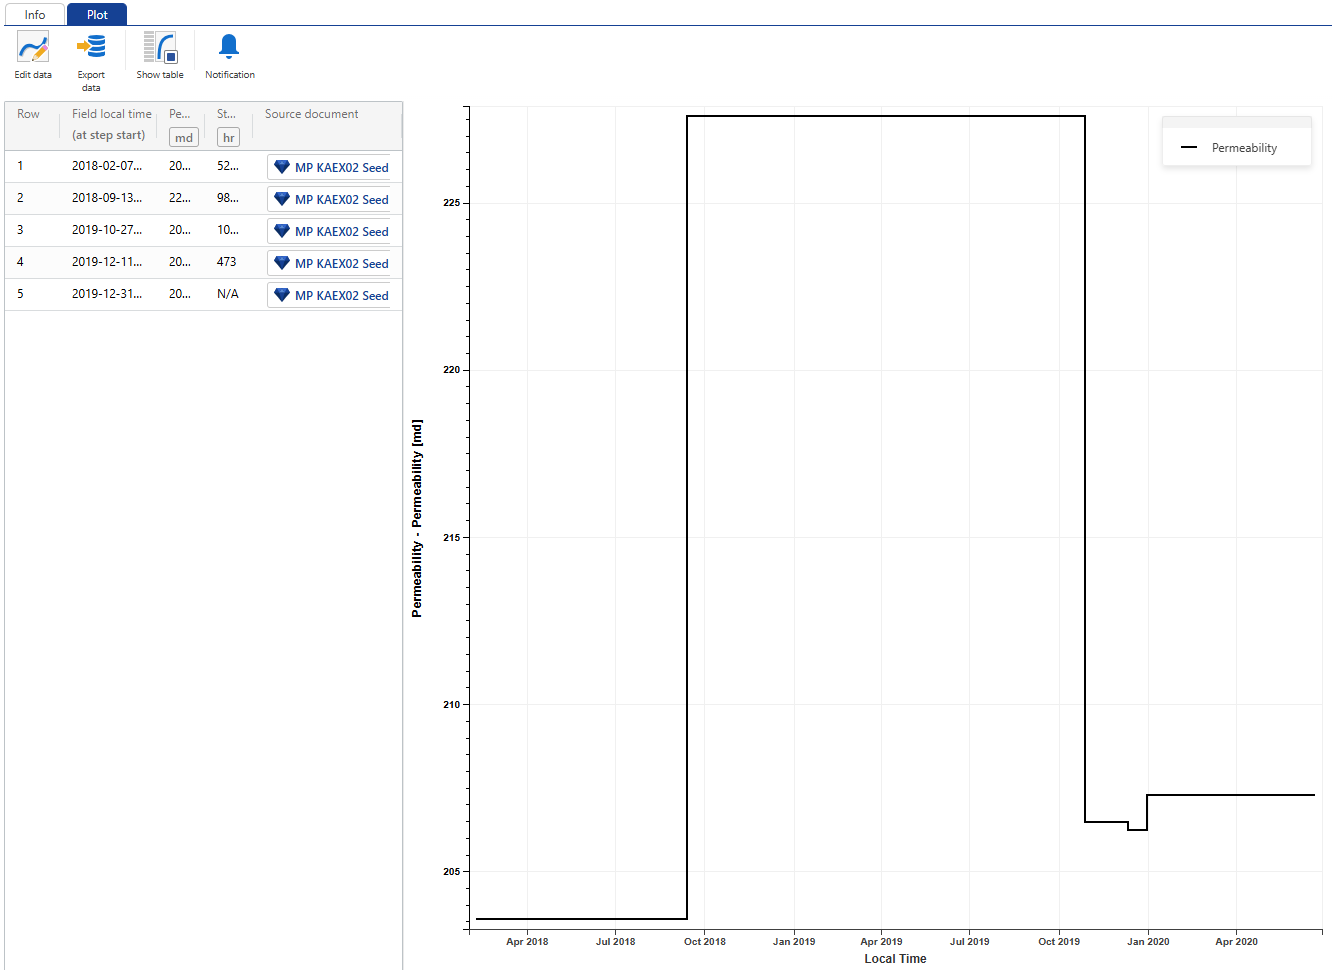
The source of a document is now displayed in the well property plot when the table view is enabled, and it is clickable.
 |
Analysis results from KAPPA-Workstation (K-W) documents stored under any iPTA and iRTA can be replicated to the Master well properties container - the main use case being to replicate properties from selective analyses as Valid properties for the well. Well properties results can be plotted or used in further processes or computations.
Like Extraction, Replication of results can be configured as desired from the XML file contained in the K-W archives (see Well Properties and Customizing Well Properties Catalog for more details).
Select the KW document under a well in the field hierarchy.
Under the Info or Plot tab, click on Replicate Results,
 .
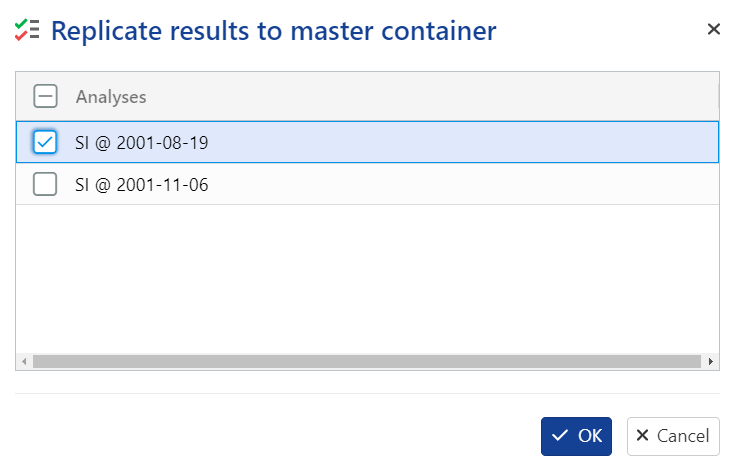
.Select the analysis from which to replicate the results:
File folders can exist under a Field or a Well group or a Well . They are created automatically when the first file is uploaded to a well or a field (see File Management for more details).
There is only one Files folder under a given field or well group or well. However, subfolders may be created under the parent Files folder. For KAPPA-Workstation files inside a given folder, results can be extracted to the Master well properties container in bulk (see Result Extraction into Well Properties for more details).
Select the Files folder (or any subfolder) in the field hierarchy.
Under the Info tab, click on File Folder,
 .
.Give the new folder a name.
Click on Create.
Note
Multiple levels of subfolders may be created.
Select the file folder in the field hierarchy.
Under the Info tab, click on Delete,
 .
.
Or,
Right click on the file folder in the field hierarchy.
Select Delete.
Warning
Deleting a file folder will delete all files under that folder.
Note
If any file inside the folder is being used in any workflow, an error message will pop up informing the user and deletion will not be possible.
Select the file folder in the field hierarchy.
Click on Rename,
 , under the Info tab.
Or,
Right click on the file folder in the field hierarchy.
Select Rename.
Note
The parent Files folder cannot be renamed.
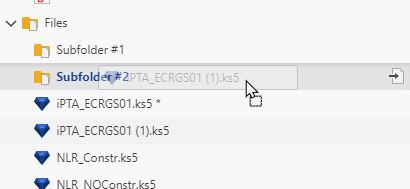
To move files from one folder to the other, simply drag and drop the file from the source to the target folder in the field hierarchy:
 |
Select the file folder in the field hierarchy.
Under the Info tab, click on Download,
 .
.The folder is downloaded as zip file.
Topaze document can be created directly under a well in KA. It will be saved in a dedicated folder, created at the same level as the current file.
To create Topaze document inside KA:
Select the well.
Under the Info tab, click on Topaze Document ,
 ,.
,.
In the pop-up dialog, enter a name for the document.
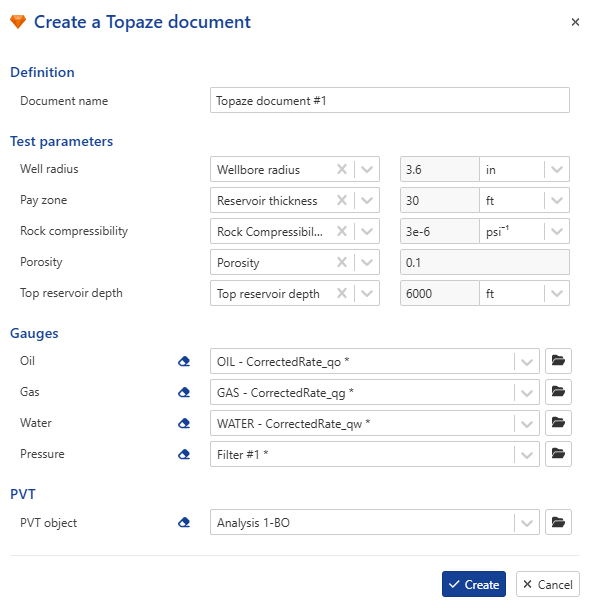
Select the well properties from the well container (if available). If not available, remove them and fill in the values manually.
Select the gauges to load.
If a PVT object already exists under the well, it will be automatically selected. Otherwise, the default three phases PVT will be used (Saturated oil + Water).
Result
When the Topaze document is created, a new folder called Files will automatically be created under the selected well. The newly created Topaze file will appear inside this folder:

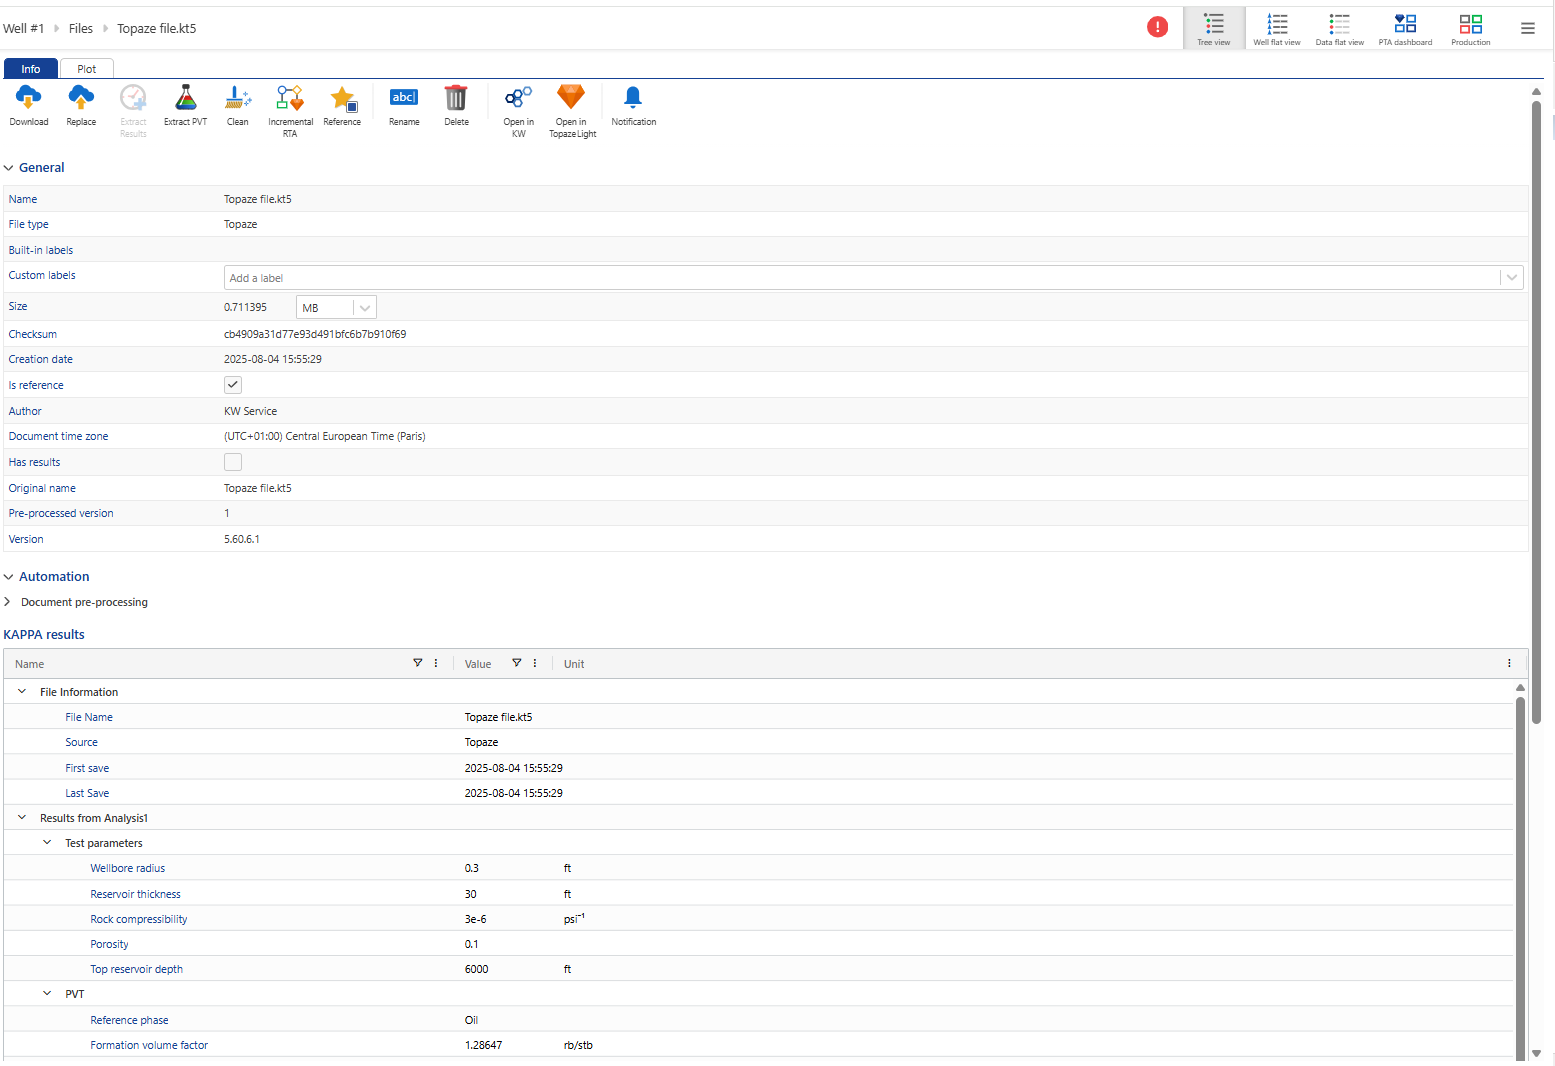
If you click on the Topaze file and go to the Info tab, you will see the general information related to the file (similar to all KW documents):
 |
If you switch to the Plot tab, you will see the gauges that were loaded into the file:
