Creating Custom Workflow
The custom workflow starts with loaded pressure and production gauges, along with a Saphir document containing PVT information. It can then proceed automatically to have complete PDG workflow.
Loaded pressure and production gauges must be loaded under the well.
A Saphir document must be uploaded under the well. This will serve as the seed PVT document for PDG workflow.
In the field/well group node click on Custom workflow,
 , under the Info tab:
This will launch the following Custom workflow dialog:
Select the Custom workflow you want to use.
Give the workflow a Name.
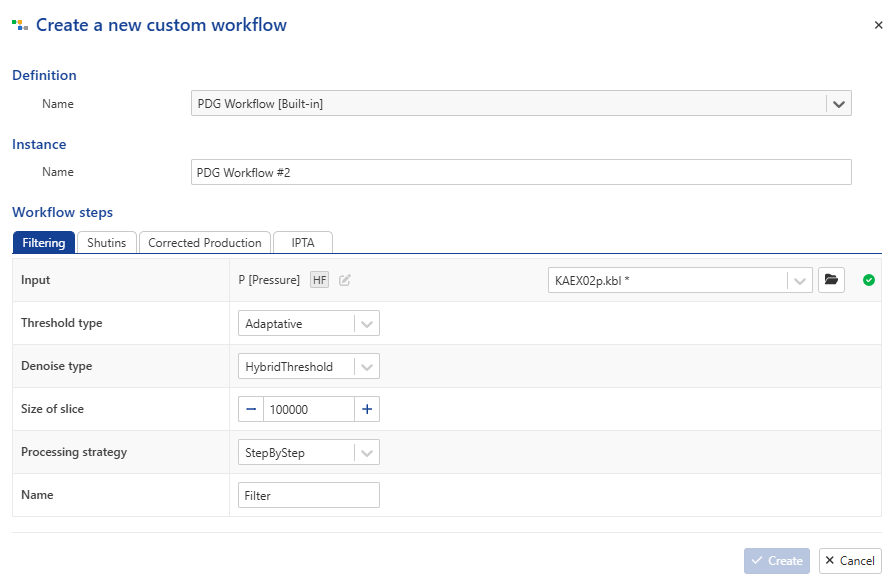
In the Filtering dialog:
Select the Input pressure (by default, it will be set to the gauges flagged as reference uploaded under the well).
Modify the filtering parameters if needed.
Switch to the Shut-in dialog.
This will display the following dialog:
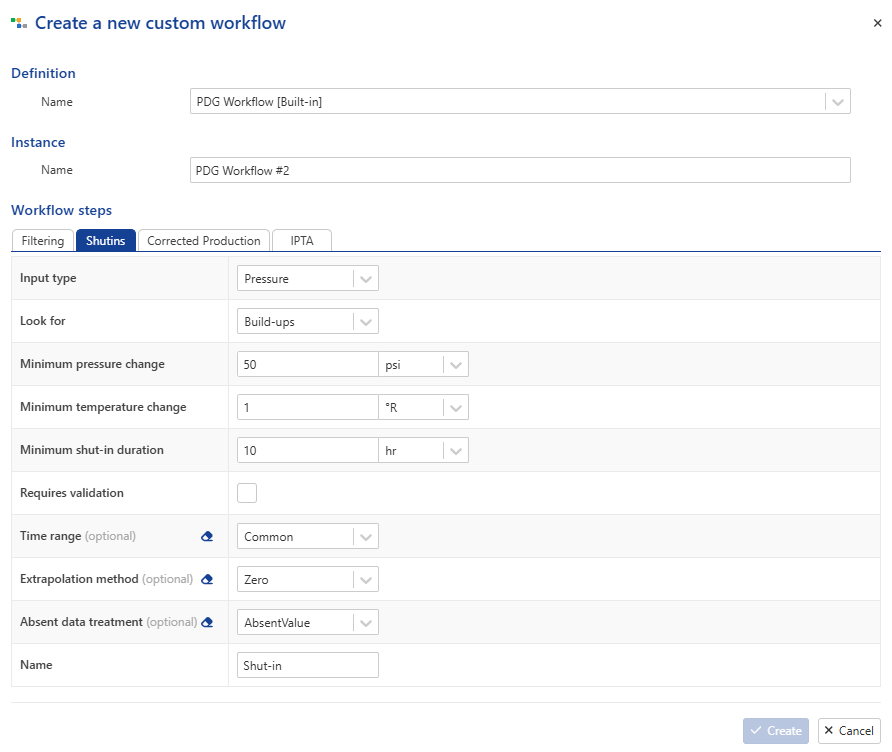
All the Shut-in inputs will be set to a defaults settings.
It is possible to modify each parameters if needed.
Switch to Corrected production dialog.
This will display the following dialog:
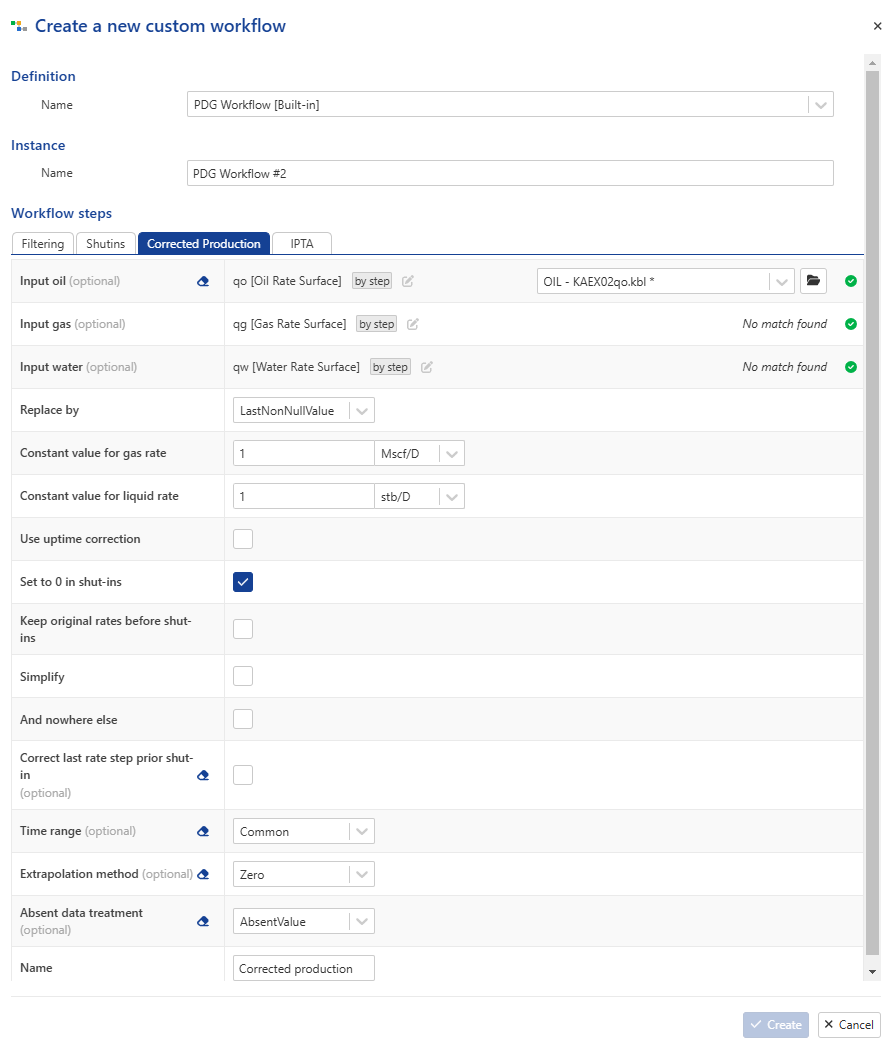
All the Corrected production inputs are set to default settings, with the reference production gauges bound automatically.
You can edit each parameter if needed.
All the Corrected production inputs will be set to a defaults settings and the reference production gauges are bound automatically. It is possible to edit each parameters if needed.
Switch to IPTA dialog.
This will display the following dialog:
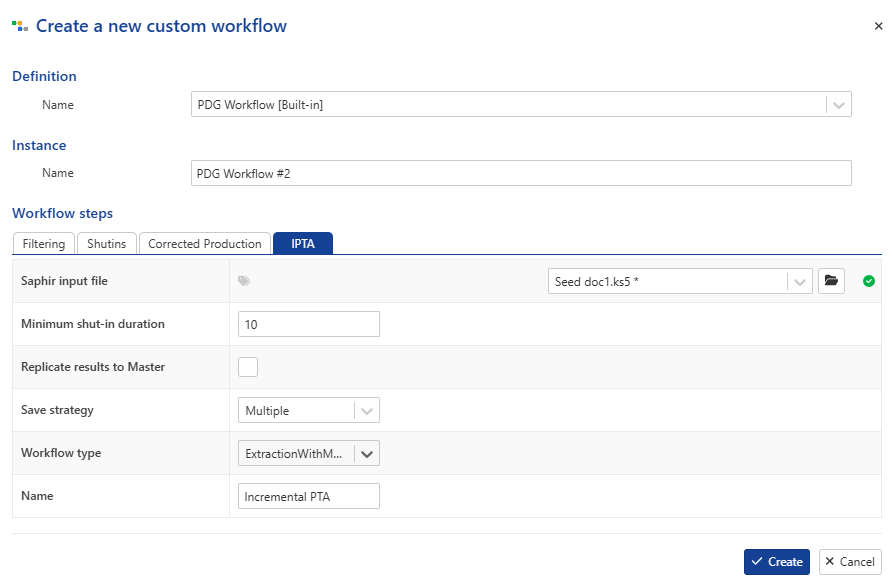
All the IPTA inputs are set to default settings, with the reference production gauges bound automatically.
You can edit each parameter if needed.
If you select a Custom workflow with Consistency and/or Alarms, you will have one/two additional dialogs to configure their parameters.