BHP Workflow bulk creation
The BHP workflow starts with Wellbore and PVT objects. See Creating BHP Workflow for more details.
A Wellbore object must be uploaded under each well.
A PVT object must be uploaded under the field, well group, or well level.
A required properties must be defined under the well properties of each well.
In the field/well group node click on BHP Workflow,
 , under the Info tab:
This will launch the following BHP Workflow dialog:
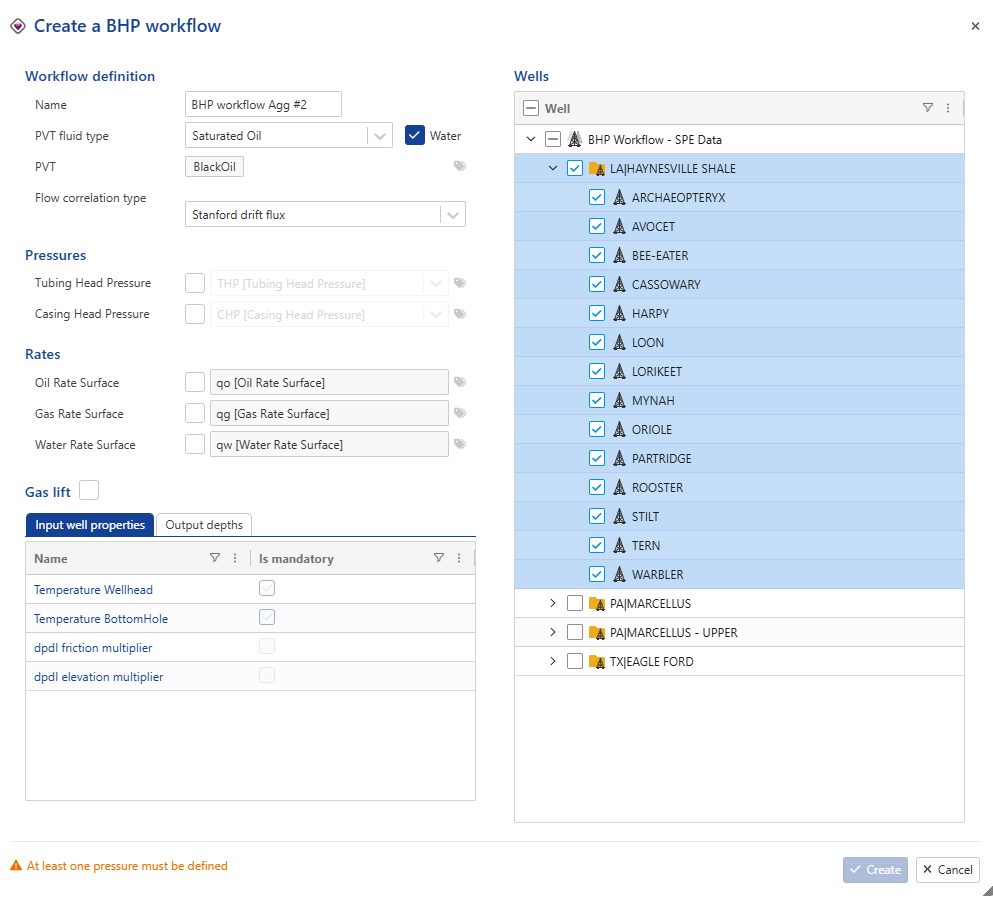
Give the BHP workflow some Name.
If needed, use additional labels to find the relevant PVT object. Labels input is not offered by default but can be accessed by clicking on
 next to the data type drop down list.
Choose the appropriate flow correlation type. (The available flow correlation options depend on the selected PVT fluid type. See BHP Workflow for more details)
Select the needed data (pressures and rates) and use label(s) if necessary to make the required binding. Labels input is not offered by default but can be accessed by clicking on
next to the data type drop down list.If Gas lift checkbox is checked:
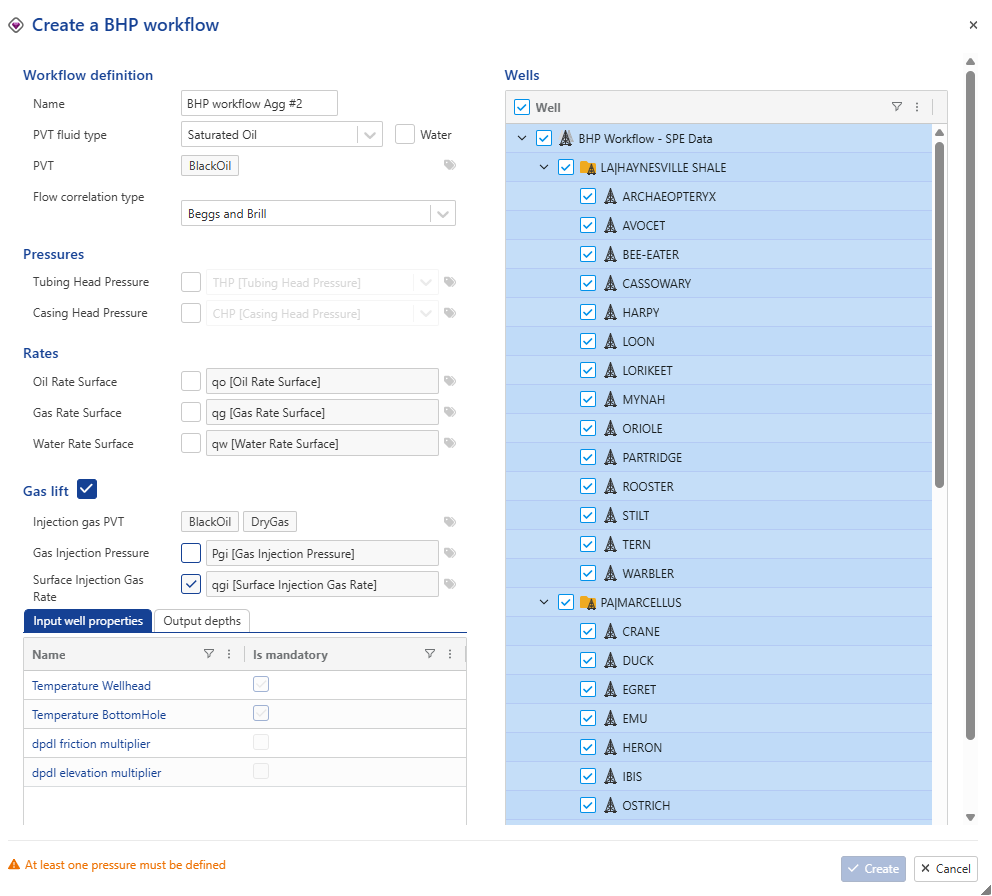
The dialog displays all defined PVT objects, including those corresponding to the production fluid and the injection gas. For BHP calculations, the workflow applies the PVT model assigned to the injection gas.
Select the Surface Injection Gas Rate (qgi) to be used in the BHP computation. If an injection gas rate is also defined in the Wellbore object, the BHP workflow will prioritize the surface injection gas rate (qgi) for the computation.
The Gas Injection Pressure (Pgi) may be left unselected or removed by clicking (remove icon) if the injection depth has already been specified in the Wellbore objects. In the absence of an explicitly defined injection depth, the workflow will default to assuming the injection point is located at the bottom of the tubing.
Select the Wells where you want to apply the BHP workflow.
In the Input well properties, the mandatory well properties are checked by default in the dialog, as they are required fields.
In the Output depths tab, specify the depth to which you want to convert the pressure.
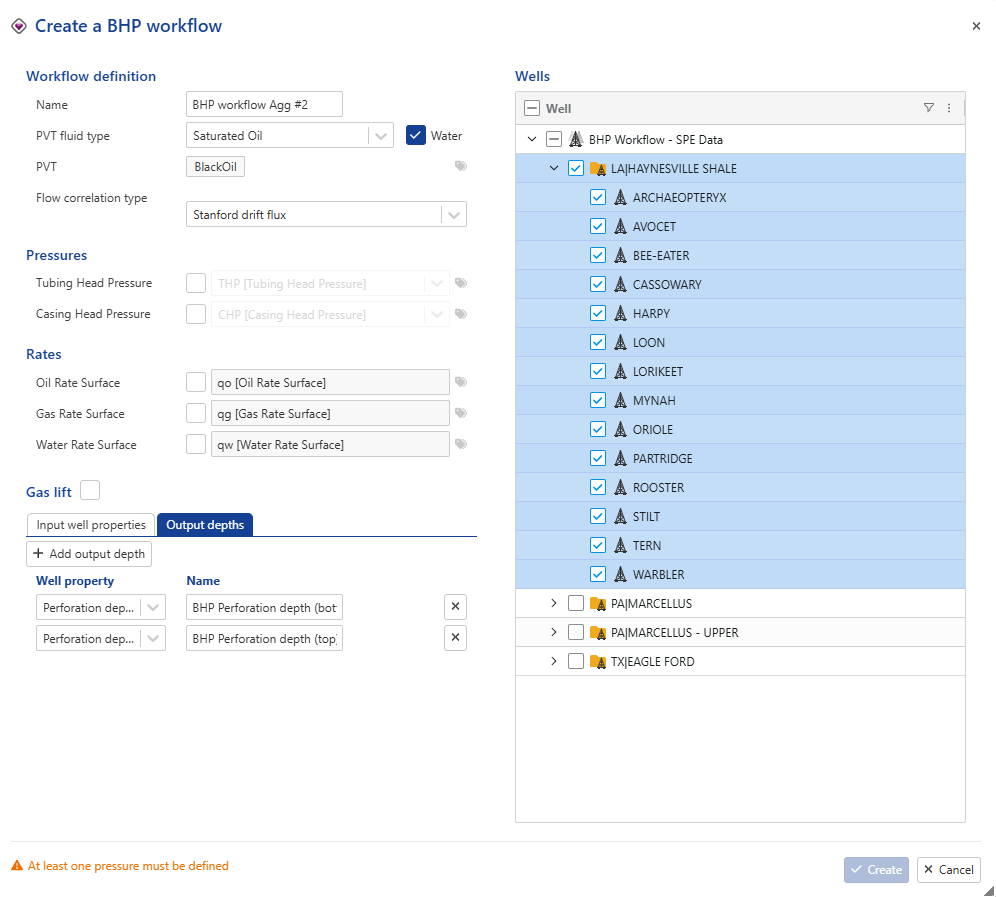
Click Create.