Defining a User Task
Switch to Automation mode.
Select User tasks in the hierarchy on the left.
Click on Create,
 , in the toolbar at the top.
Under the General Tab:
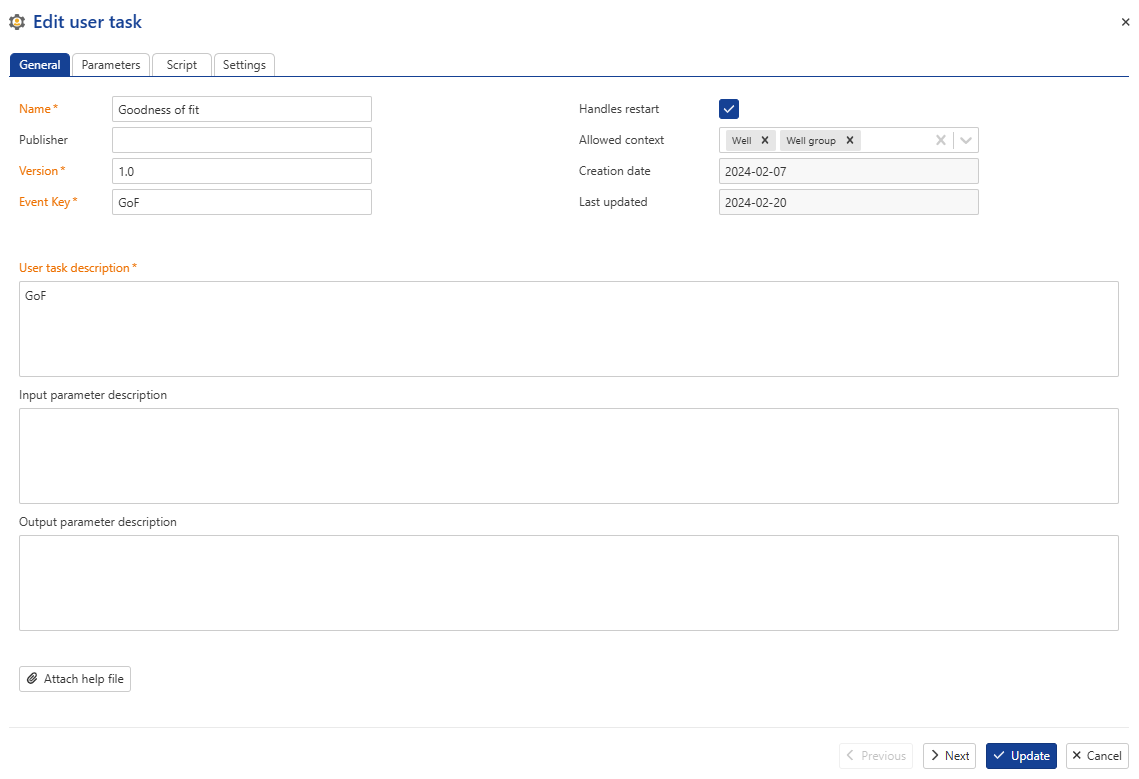
Give the new user task a Name. Name must be unique and can be a combination of letters, symbols and numbers.
Set a Version. Version can consist of letters, numbers and symbols; it can be useful in future development or testing a user task.
Define the Event Key. This can consist of letters, numbers and symbols; it can be used to create events publications that users can
subscribe to and/or use in the future.
Check Handles restart input if you want to allow this user task the ability to restart the job after it has been defined.
In Allowed context dropdown list, select where you can create this user task: well, well group, field or all of them.
Note
User task definitions are now filtered based on their allowed context. For example, at the well group level, only tasks defined with the well group allowed context will be visible, and the same applies to each level.
Enter a User task description. This should be comprehensive enough for an end-user to understand what the task is doing.
Tip
This information can be viewed during user task instance creation:

Optional. Type in Input parameter description and Output parameter description. Like User task description, they can be viewed during task instance creation.
Optional. Upload a help file (doc, pdf, or text) by clicking on Attach help file icon. This file should provide a description of the user task together with the instructions on how to use it.
Click on Next to move to the Parameters tab.
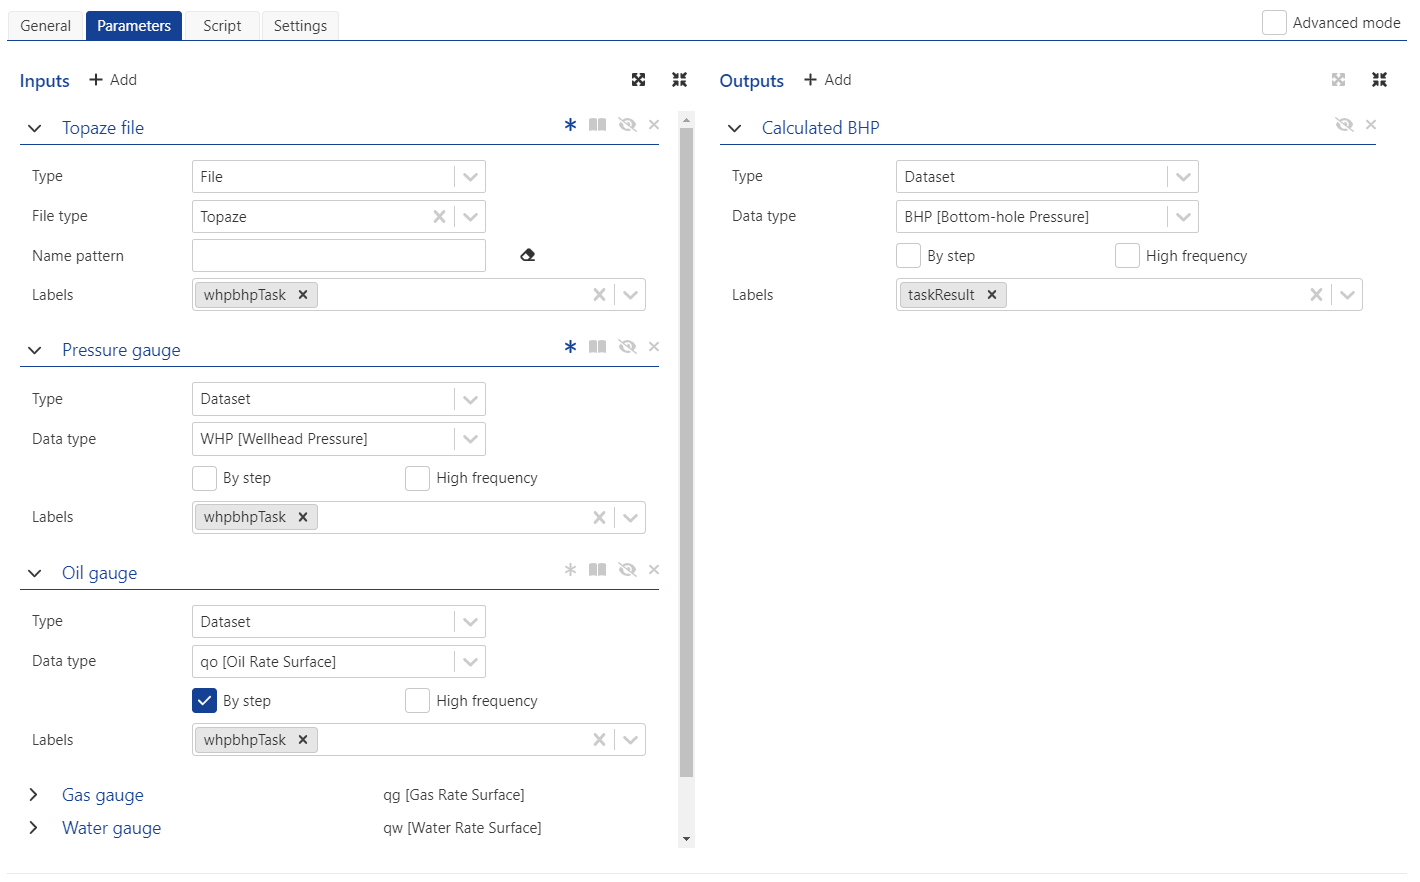
The left part of the dialog lists Inputs while the right one lists Outputs.
Under the Parameters tab:
To add a new input or output parameter, click on Add under the relevant section.
Specify the parameter name, its attributes, Type and Data type.
Specify whether the parameter is By Step and/or High frequency.
Optional. Add a label to the function if it is going to be used in the future. Label can be selected from the dropdown list or created by typing a name and hitting Enter.
See User Task Parameters for more details.
Tip
As the parameters list grows, it may affect the readability of the list. In such cases, it is possible to collapse the parameters description list to make it concise by clicking on
 . To expand all the parameters back click on
  . Individual parameters can be collapsed/expanded using the chevron next to the parameter name.
Click on Next to move to the Script tab.
This is where the main script of the user task will be written.
See User Task Script for more details.
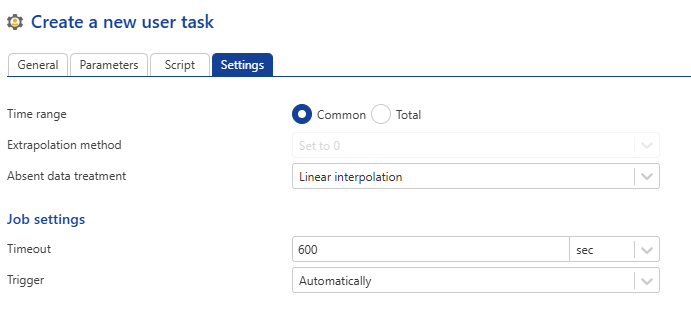
Optional. Click on Next to access the optional Settings tab, where Data Synchronization and Job settings can be customized for the user task.
Click on Create.
The topic relates to definition of user task parameters when creating a user task (see Defining a User Task for detailed procedure).
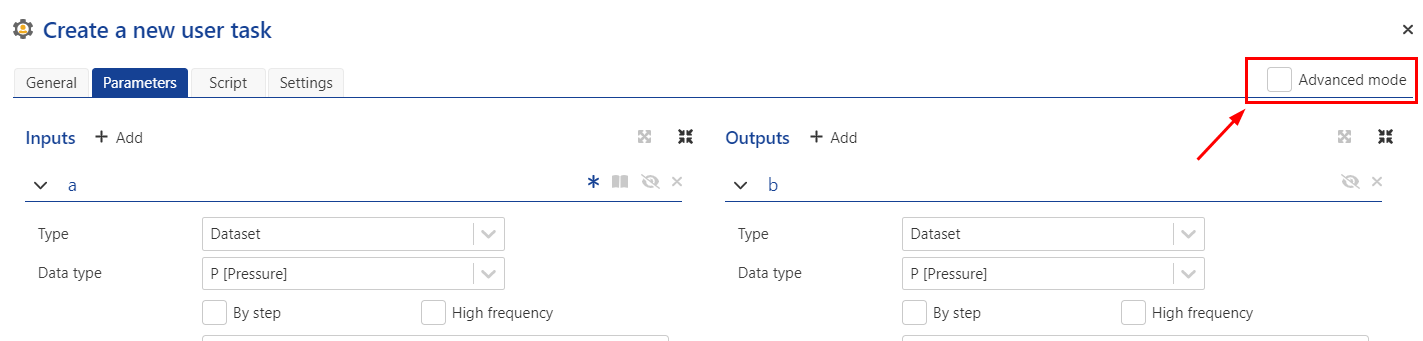
User task parameters are handled under the Parameters tab in the user task creation dialog. They can be defined in Basic (default) or Advanced mode. Users can toggle between the two using the Advanced mode checkbox at the top-tight corner of the dialog:
 |
This is the default mode when creating a user task. It offers a simplified user interface to add, define, customize and delete user task parameters:
 |
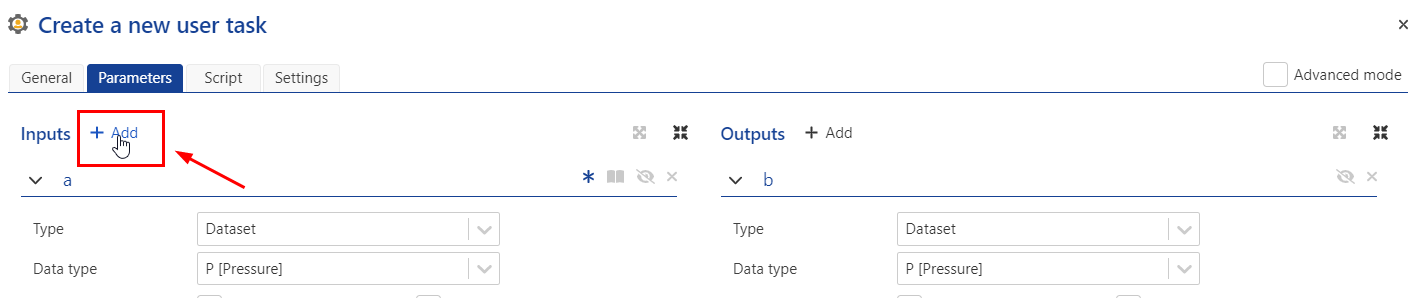
To add a new parameter, click on +Add next to the Inputs label:
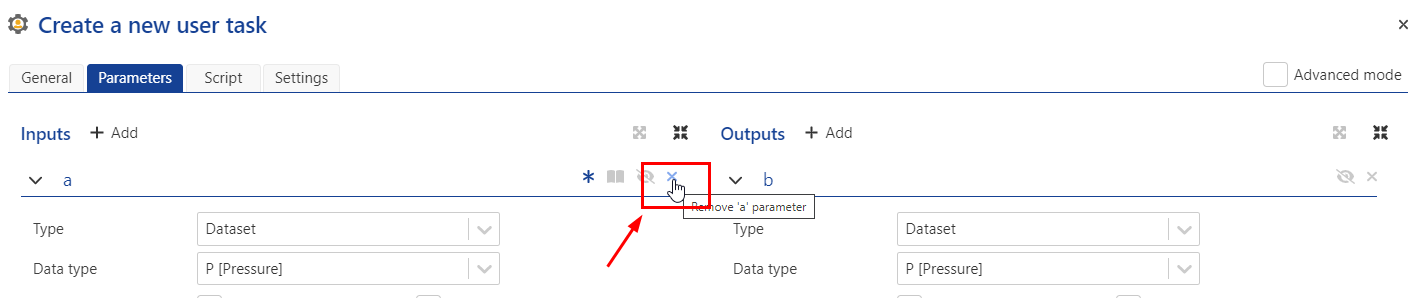
To delete an existing parameter, click on x:
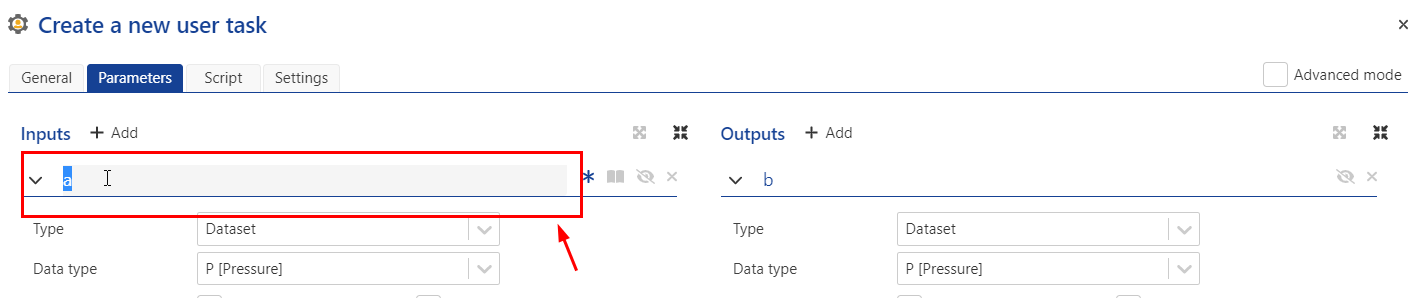
To rename a parameter, select the current parameter name (a in the illustration below) and type in the new name:
The behavior of a given parameter can be set to one of the following:
Mandatory or Optional: For Input parameters only. Toggle on (
 ) or off(
 ) to specify whether the parameter is mandatory (on) or optional (off).
Read-only or Editable: For Input parameters only. Toggle on (
 ) or off(
 ) to specify whether the parameter is read-only (on) or editable (off).
Hidden or Visible: Toggle on (
 ) or off(
 ) to specify whether the parameter should be hidden (on) or visible (off) during user task instance creation.
For a given parameter Type, users can select the Data type and specify whether the data are By step and/or High frequency.
The following parameters types are available. For any given Type, a choice of Data types is also offered:
Type | Definition |
|---|---|
Boolean |
|
String |
|
Double |
|
Integer |
|
Data/time |
|
Enum |
|
File |
|
Dataset |
|
Well property |
|
PVT |
|
Wellbore object | |
Well property container | |
File folder | |
Survey container | |
Model Book |
This mode is used for more complex user tasks with conditional parameters and can help creating a more user-friendly interface for the end-user when creating a user task instance. It also can be used for the complex parameters’ validation and gives the possibility to set the parameters using YAML.
When turned on, the Parameters tab display changes and consists of four parts. Top left section is the Input and output parameters description in YAML. Top right section is used to insert the JavaScript that describes the rules for the parameters transformation.
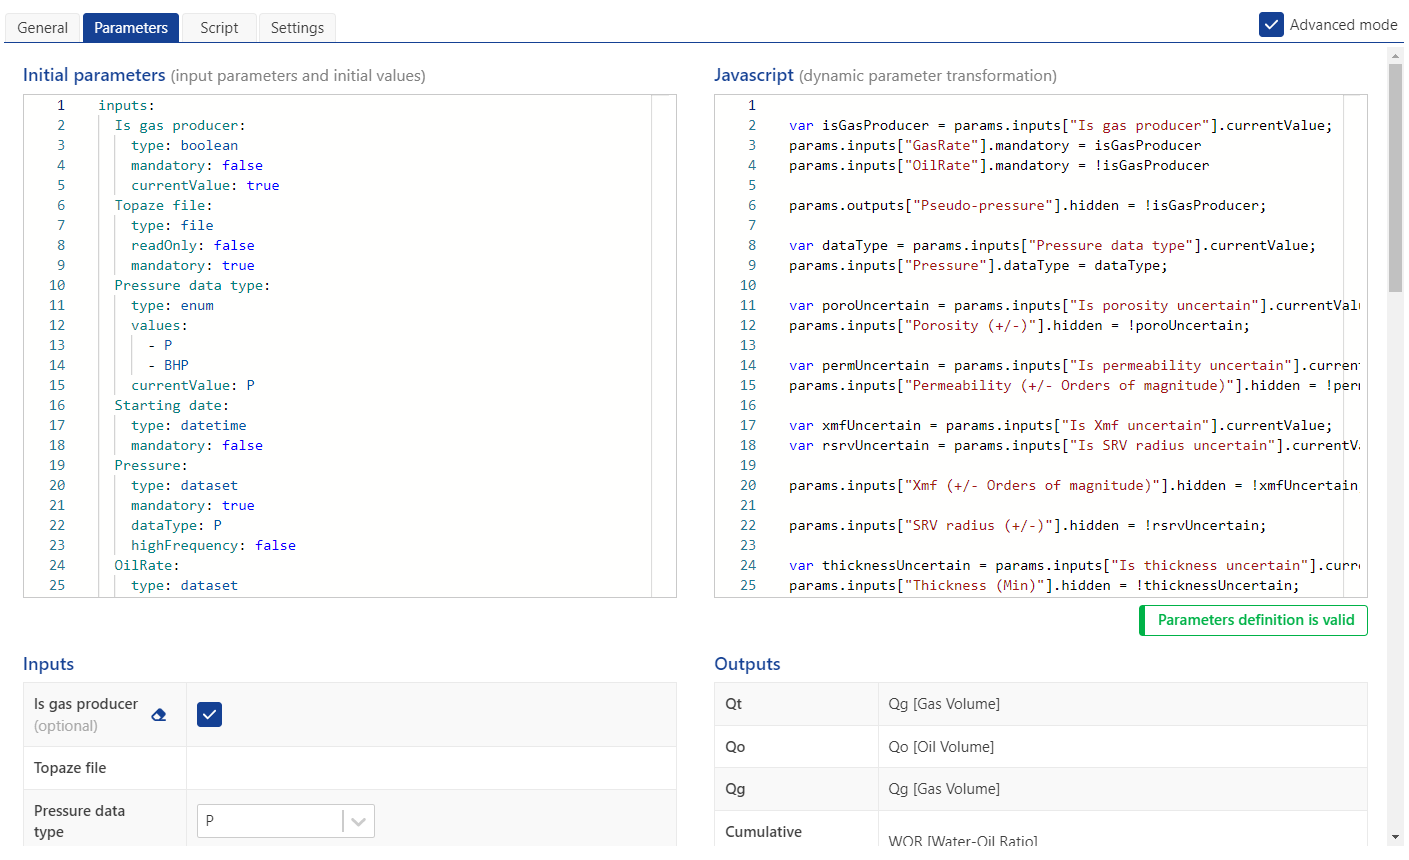 |
If the parameters were set in the simple mode the YAML description is created automatically and can be reviewed when switching to Advanced mode.
Bottom left and right sections are concise descriptions of the Inputs and Outputs, based on the YAML script, correspondingly.
To check that the YAML and Java Scripts do not have syntax errors click on Validate. if there are no compilation problems you will see Parameters definition is valid; otherwise, the information on the possible errors will be shown in red either under the Input parameters or JavaScript box depending on the error; if error description is too long to fit the allocated space, click on Details to see the complete text of the error description.
For more information, see KAPPA-Automate Extension Guide.
User task script is a code to implement a user's workflow inside KAPPA-Automate. This is achieved by inserting the code block into the Scripts tab in the Create a New User Task dialog box.
Currently, K-A supports user task development in Python language.
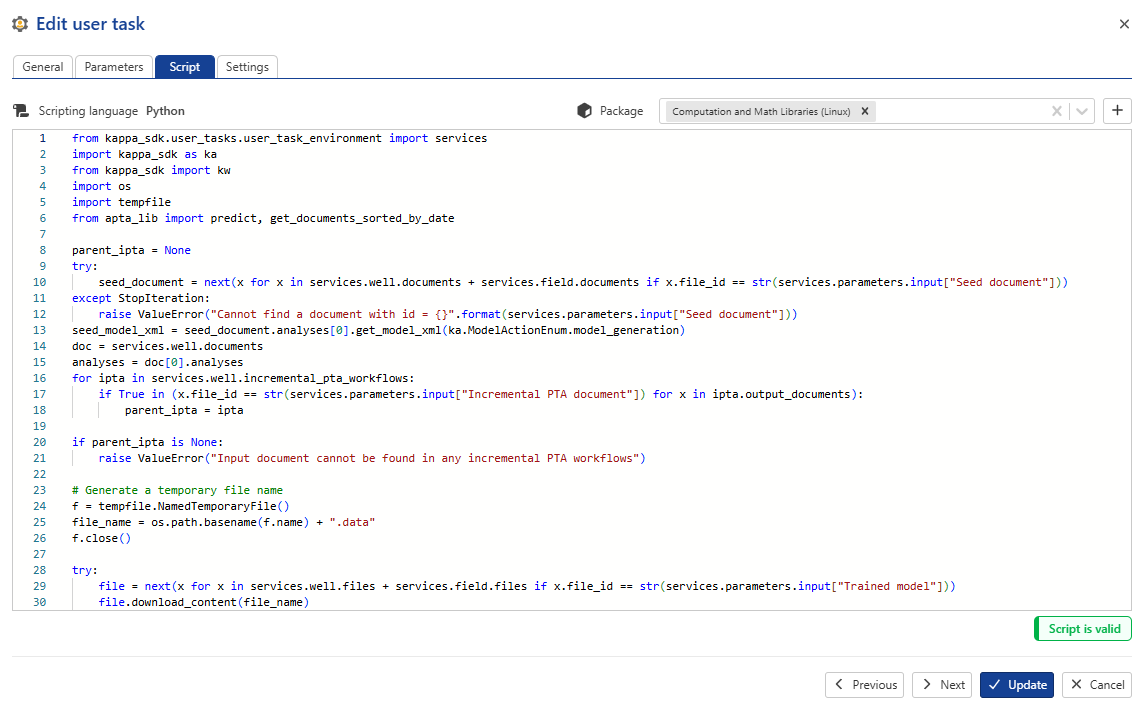 |
Tip
To facilitate the task development in Python, an SDK provides a simplified access to the platform APIs. The Python SDK can be used to develop and run a code locally, and then migrate this code into a User task in K-A so that it can be executed by the platform automatically on selected triggers. The detailed information on the code development can be found in the KAPPA Automate Extension Guide.
When programming more elaborate tasks, it may be necessary to load external packages/libraries. These could be standard Python libraries e.g., Numpy, Scipy etc., or user modules. The packages to be used in the main script of a user task should be uploaded to the list of packages before creating the task. (see Uploading Packages for User Task Scripting below).
If certain packages to be used in the main script are not already available on the backend, they should be uploaded to the list of packages before/while creating the task.
Uploading a package before creating a user task
Switch to Automation mode.
Select User tasks in the hierarchy on the left.
Switch to the Packages tab.
Click on Create.
Input the following information about the package:
Name: any combination of letters, numbers and symbols.
Scripting language: Python.
Package description: text information that helps managing the packages.
Upload the package. This can be done in one of two ways:
Click on Select zip package. Or,
Drag and drop the zip file in the Drag and drop zip package area.
Click on Create.
Uploading a package while creating a user task
Under the Script tab, click on + next to the Package dropdown menu.

Input the following information about the package:
Name: any combination of letters, numbers and symbols.
Scripting language: Python.
Package description: text information that helps managing the packages.
Upload the package. This can be done in one of two ways:
Click on Select zip package. Or,
Drag and drop the zip file in the Drag and drop zip package area.
Click on Create.